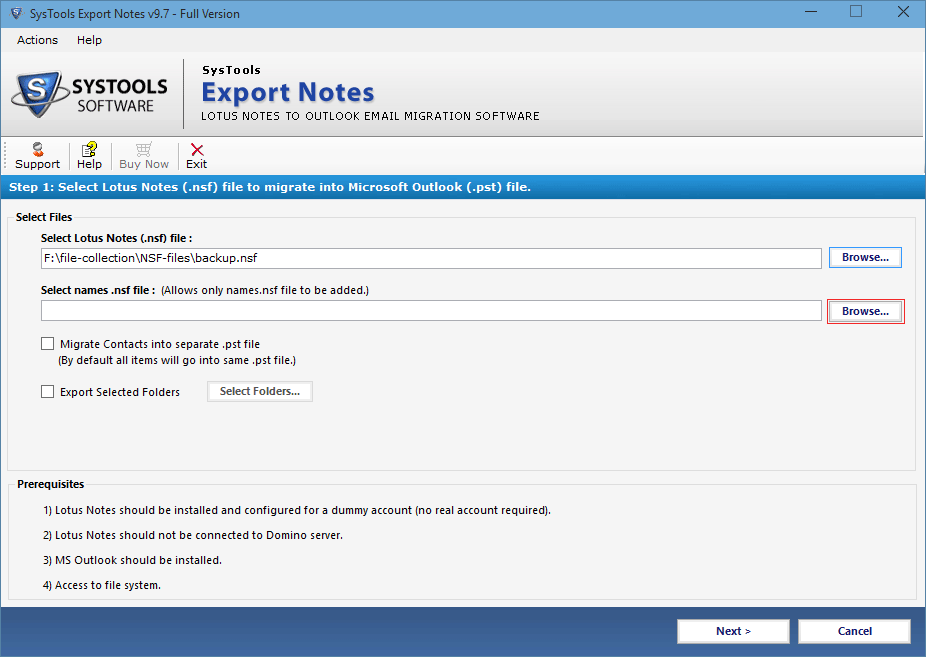
If you want to create separate PST file for Lotus Notes Contacts, then load the Names.nsf by clicking on Browse button.
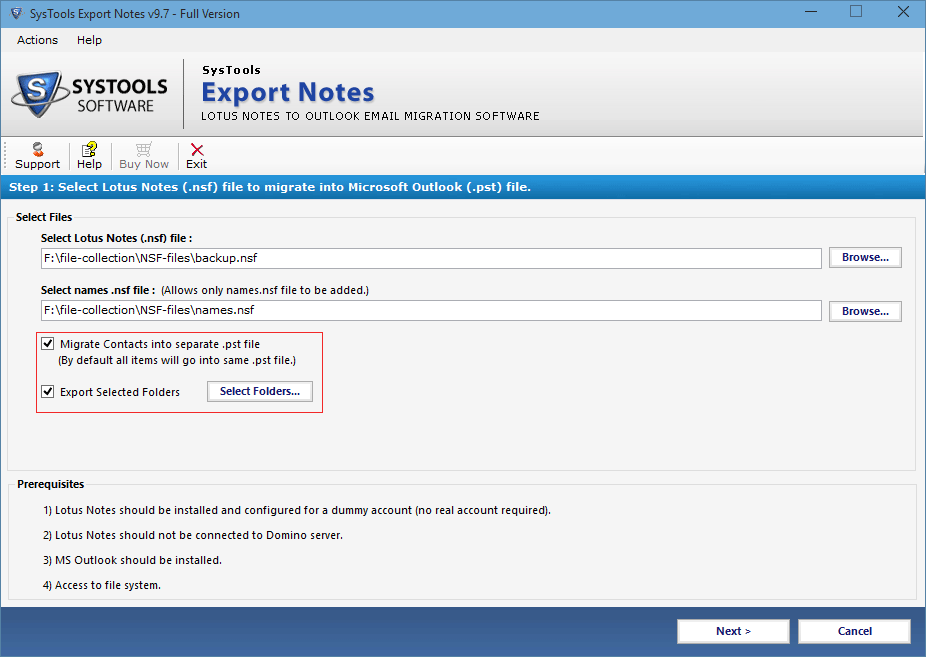
To get Contacts in separate PST file, then check in the option of "Migrate Contacts into Single File".
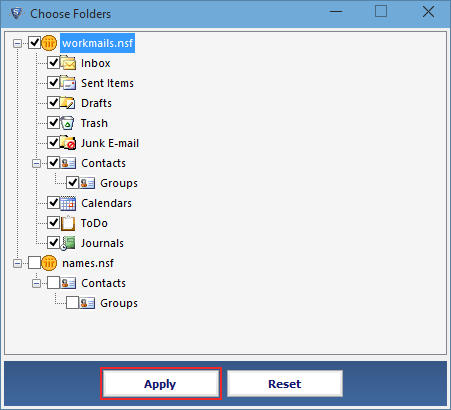
If you want to export selected folder, then check the option of it. Afterwards a window will open in which you can select the desired folders and click on Apply button.
You can also Apply Filter(s) to exclude the unwanted data by selecting the range to filter and then apply the Settings. Filters can also be applied to Emails, Calendars, To-do lists or Journals.
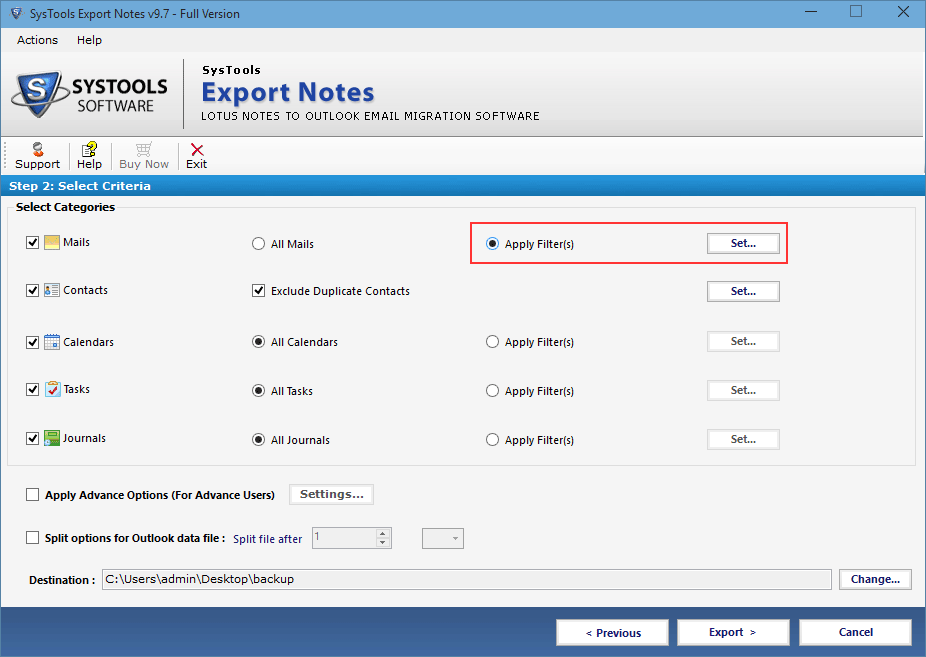
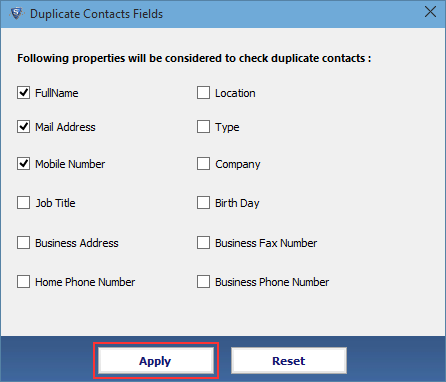
As you click on Setting to remove duplicity then mentioned below window will pop up in which you have to check in the option of on what basis you want to remove duplicity .
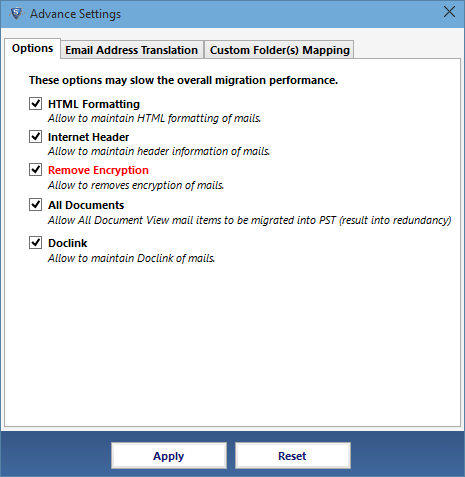
When you click on the Advance Settings option then there are various option are given below like HTML Format, Preserve Internet Header, Remove Encryption, All Document Conversion, Save Doclinks which you want check in the corresponding option.
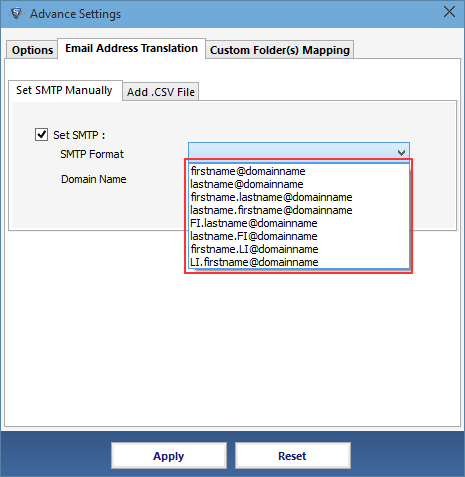
In the Next Tab, there is an Email Address Translation in which user can set the SMTP domain name for Lotus Notes Canonical Names.
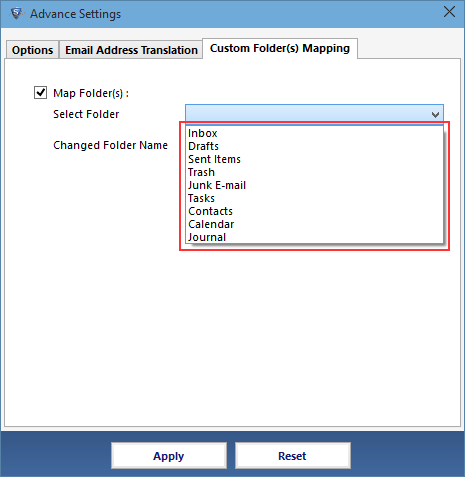
In the 3rd tab of software , Custom Folder(s) Mapping option is provided. In this option, a software maps the system folder or User defined folder then click on Apply option.
