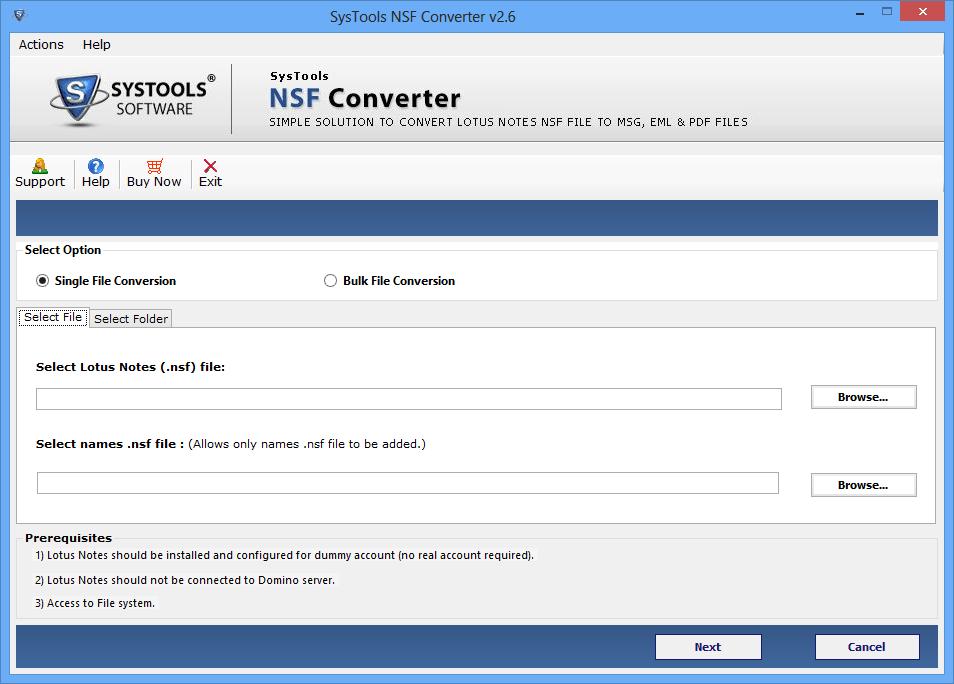
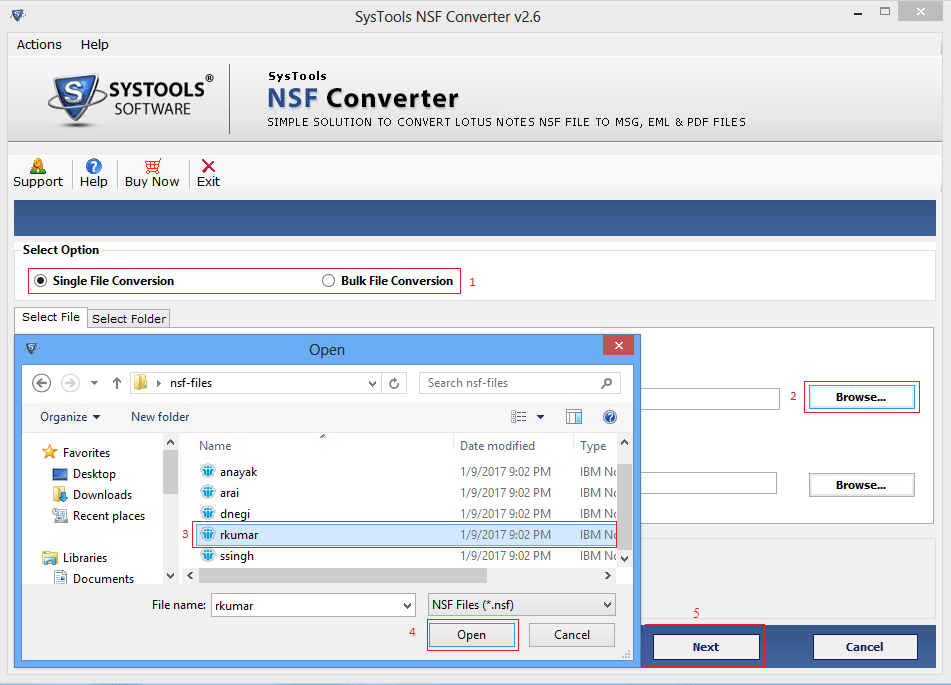
Now two options will get appear Single File Conversion & Bulk File Conversion. To convert single file, then go through the Single file Conversion option and click on Next button to start the process of conversion.
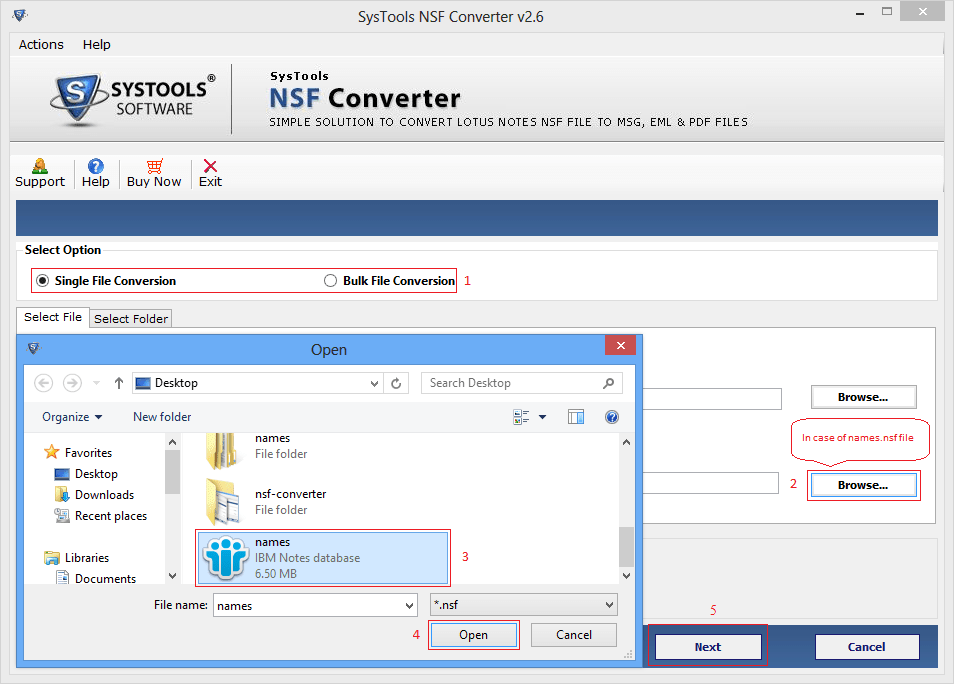
In case if you want to perform contacts conversion, then browse Names.nsf file and open it. Now click on Next button.
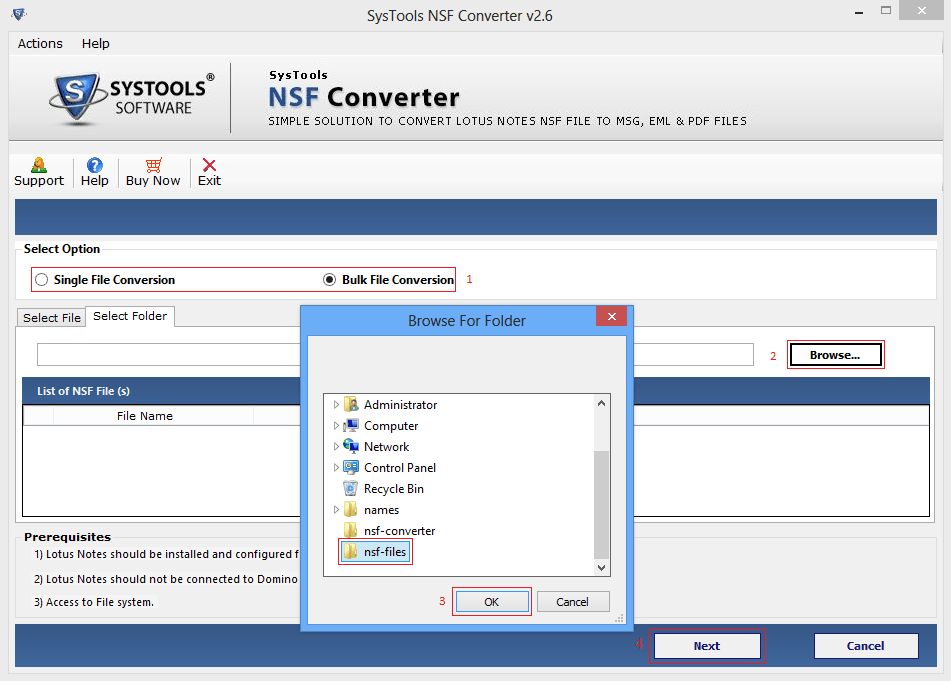
If you want to convert files in batch, then go through Bulk File Conversion option and browse the folder then Click on Next.
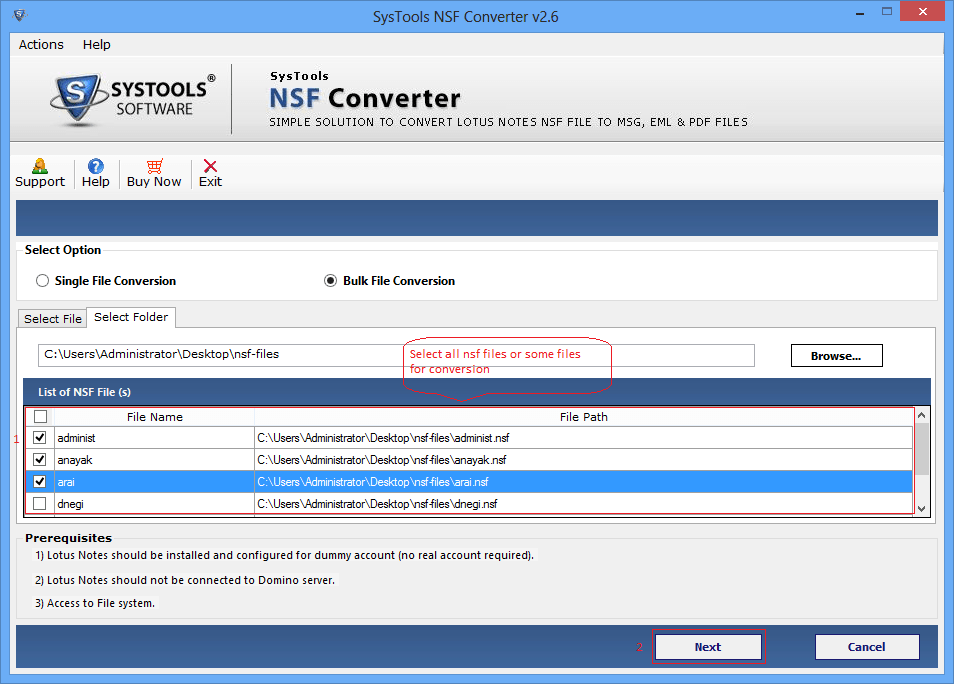
Now you will have the the list of files for bulk conversion. You can choose any number of NSF files to export.
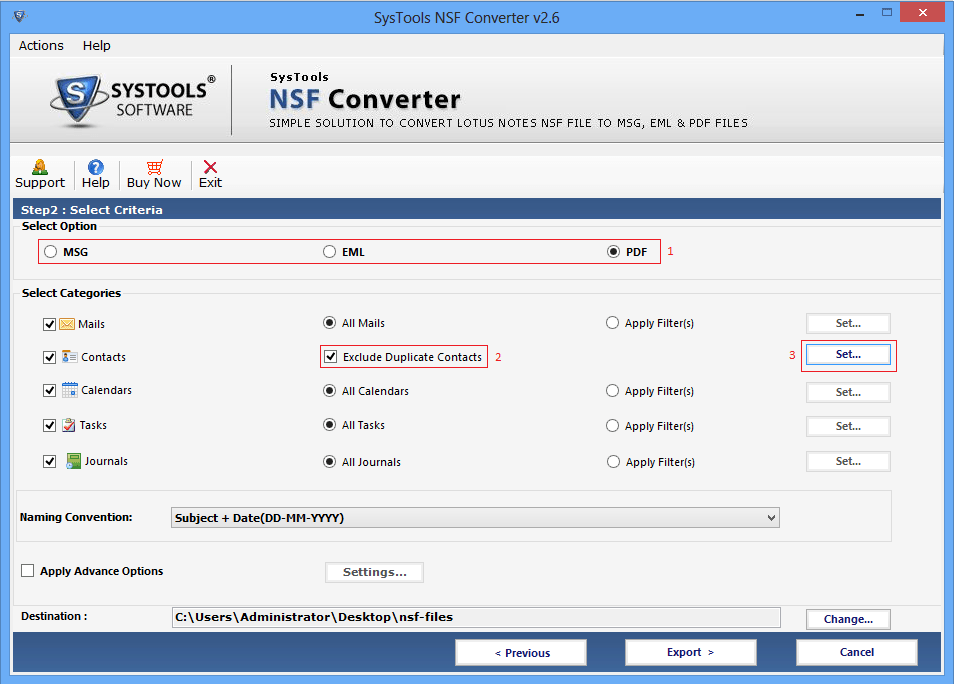
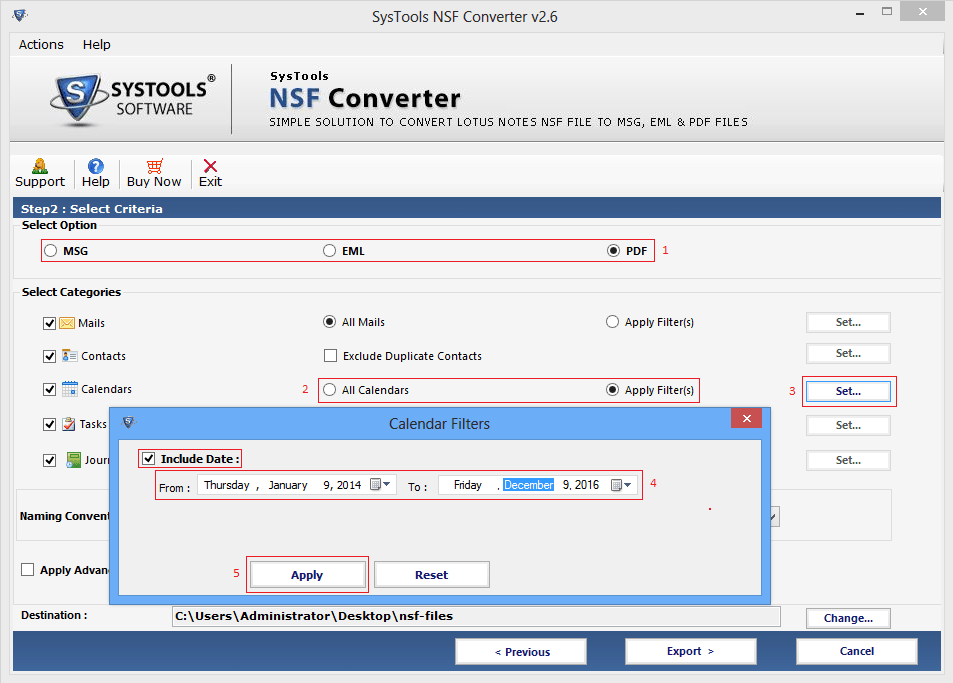
In the given below screen, select any file format PDF. You can also apply Include Date Filter option through which you can select the mails from the Categories.

If you want to remove duplicate contacts, then select Exclude Duplicate Contacts option.
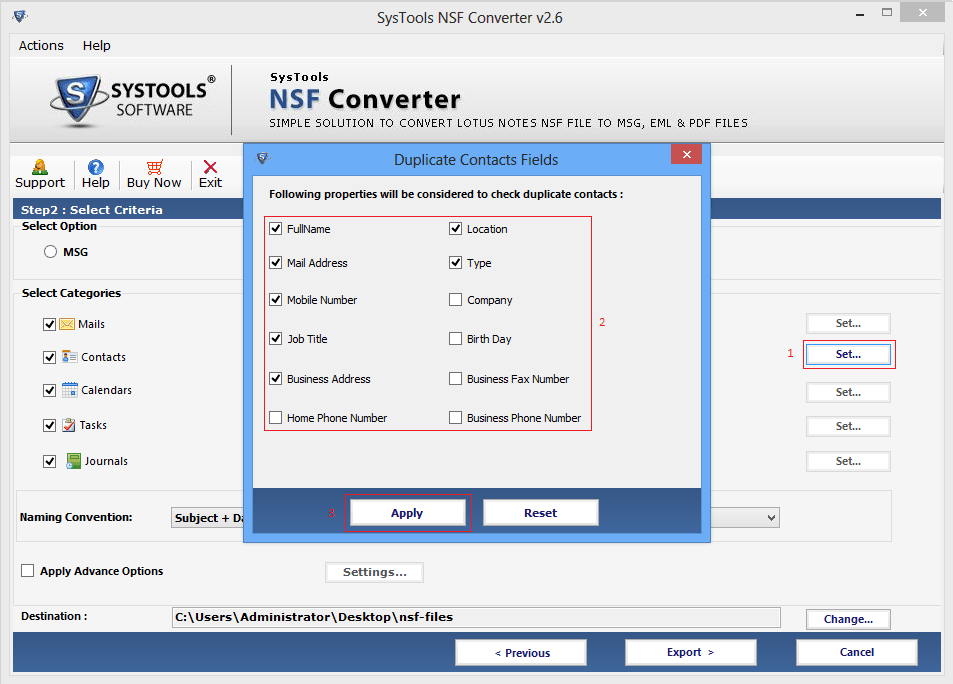
So there are many items for contacts like name, mobile number etc. You can select any categories to filter the duplicate contents.
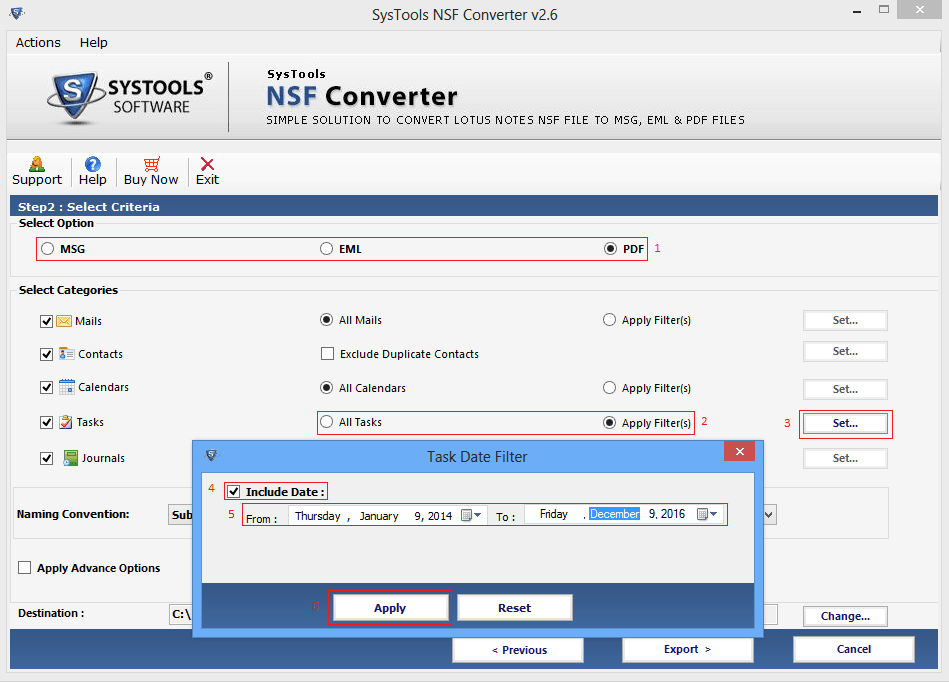
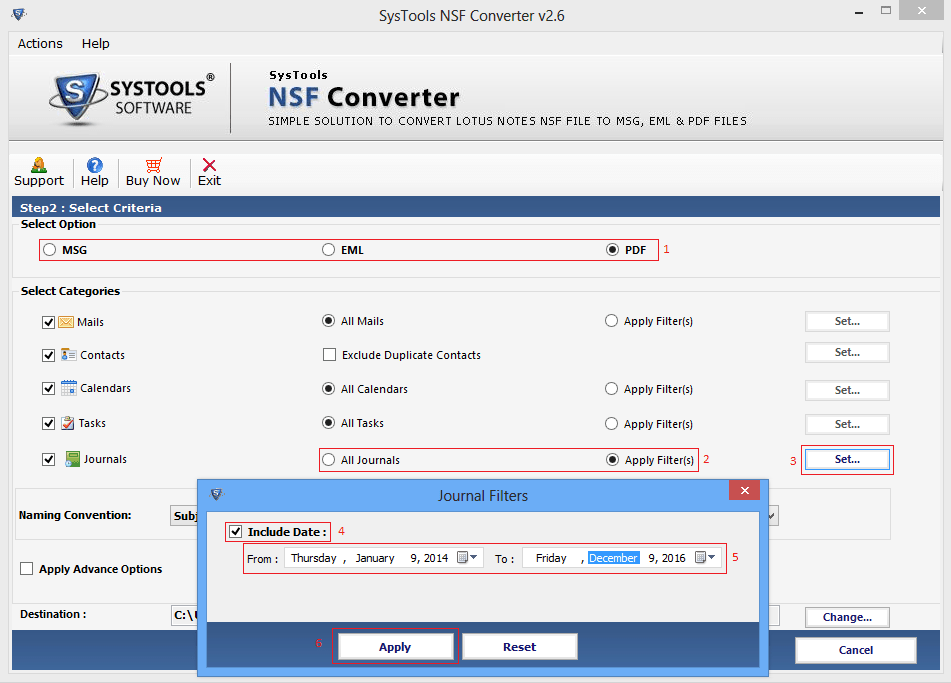
There are multiple filters to apply on multiple fields i.e. calenders, task. Users can apply it accordingly.
Apply Calender Filters in calenders
Apply Task Filters in tasks
Apply Journal filters in journals
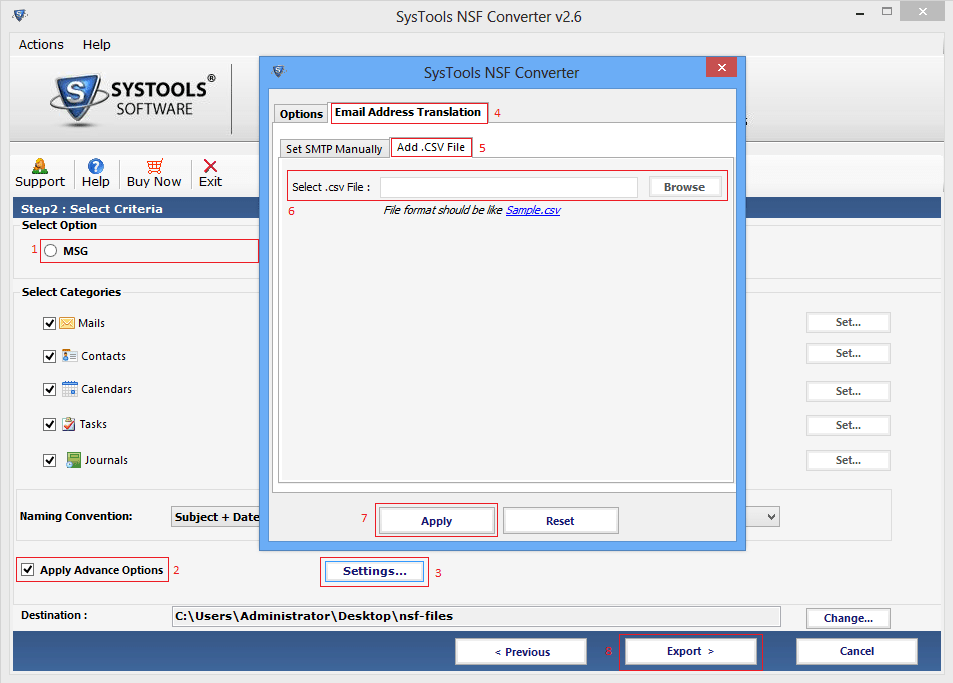
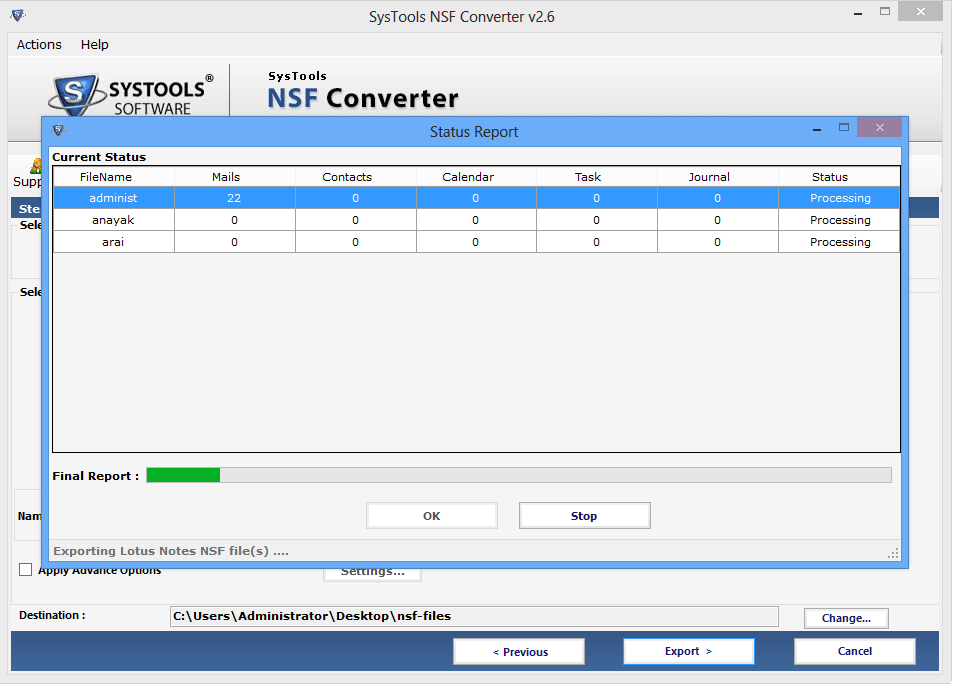
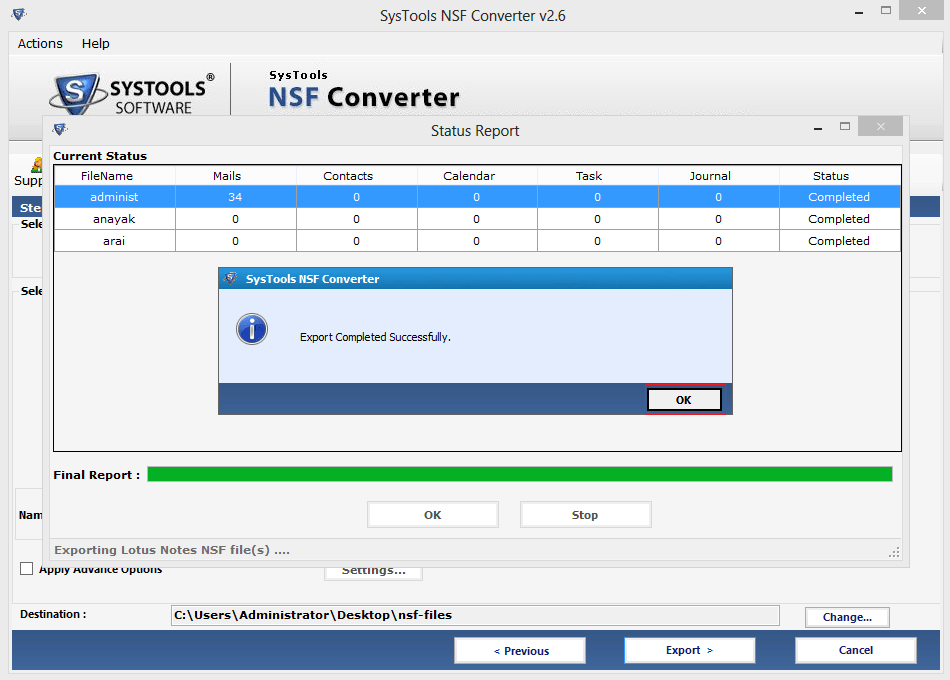
Now you have to choose the date time format and Naming Convention option and click on Export.
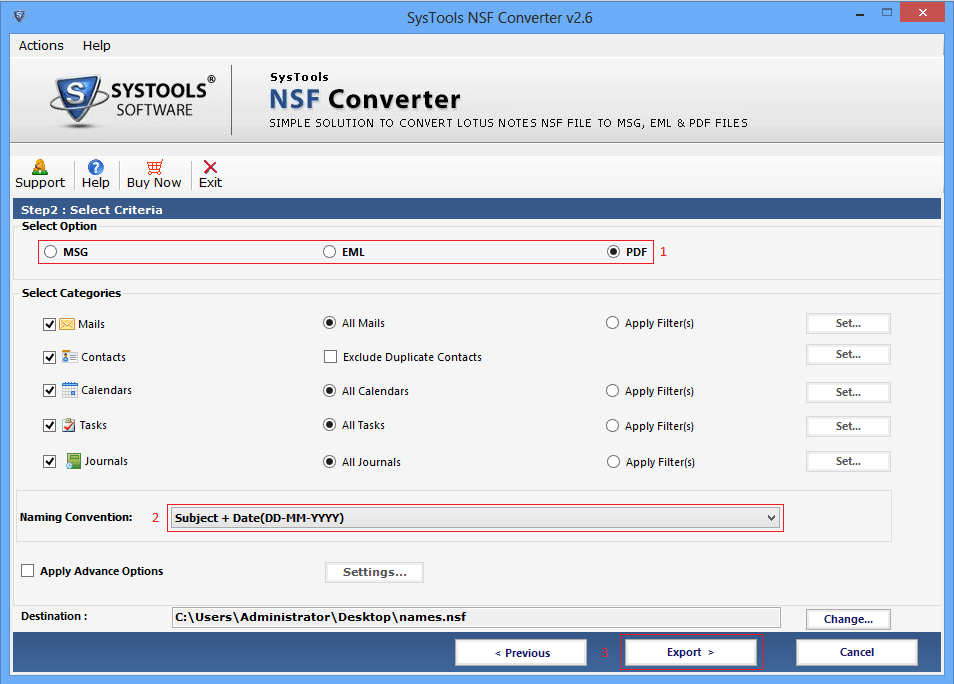
Now click on Apply Advance Options to select the options like HTML Formatting, Internet Heading, Remove Encryption etc.
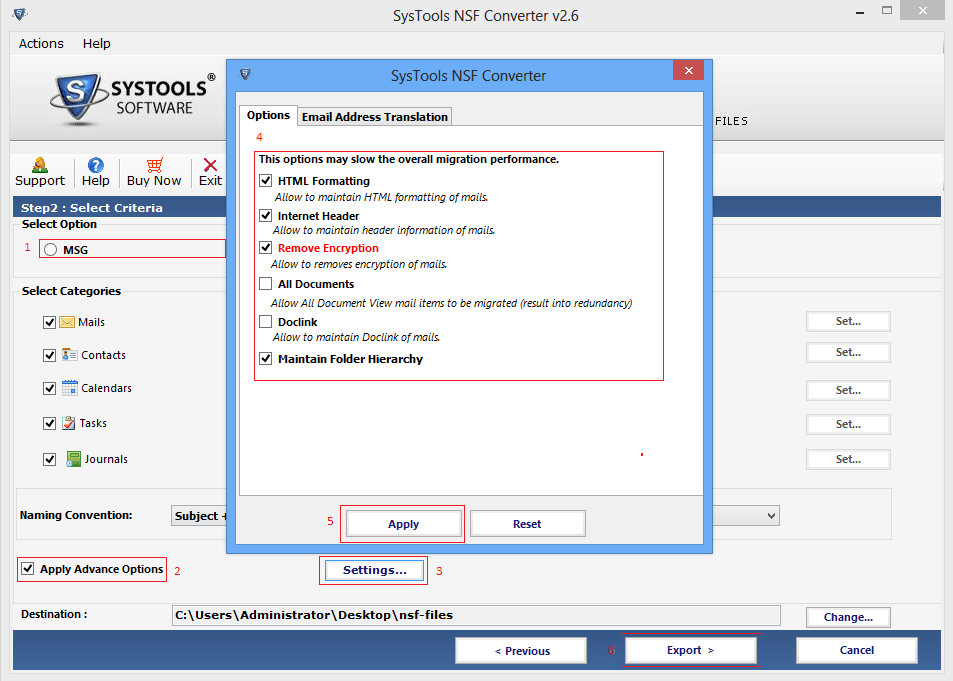
Second option of Email Address Translation in advance settings, in which you can set SMTP manually.

You can also choose CSV file and browse the csv file from the system